Mx Vs Atv Supercross Encore Crack Download
Introduction
This guide will innovate you to MX vs. ATV Supercross Encore mXcavator (mXcavator) and explain the tools that are available also equally how and when to use them. In one case you lot accept finished reading you should have all that y'all need to build and share your custom motocross tracks with the MX vs. ATV Supercross Encore community.
○ Starting mXcavator
To start mXcavator:
- Open the Steam MX vs. ATV Supercross Encore library page.
- Printing the [] button.
- Select 'Launch MX vs. ATV Supercross Encore mXcavator' from the list.
- Press the [] button.
When mXcavator opens you will be given the choice between two types of terrain, Supercross on the left or National on the right. Select the one that best suits your design and press [] to open mXcavator and create an empty runway fix for you to commencement designing.

These utilise a top map with a size of 1024 x 1024 which creates an area of ground measuring 1023 ft 10 1023 ft. They are best used to make Indoor Supercross tracks and the stadiums are designed to sit around these types of rails.
Supercross tracks volition appear in game under the Freeride menus and if you lot have added a race activity they will also appear in the Supercross menus.
National trackThese utilise a height map with a size of 2048 ten 2048 which creates an area of ground measuring 2047 ft x 2047 ft. They are best used to brand Outdoor National tracks.
National tracks will appear in game nether the Freeride menus and if you have added a race activity they volition likewise announced in the National menus.
Note: All user made tracks volition work online.
○ Workspace layout

- Main toolbar - top.
- Rollout console - left.
- 3D view of the rail existence designed - center.
Your workspace layout is saved and mXcavate will re-open with the same layout that you gear up before you last closed the program.
Chief toolbar - top

There are the usual New, Load and Save buttons. Track projects can be saved, which creates a ready of files that include the project file that lists the rail settings and the files that are needed to load the rails into mXcavator. These include the textures that are used to build the terrain, the list of rails objects, a file that sets upwards the activities and the forest settings.


There is an Undo system, and so one slip of the mouse doesn't demand to be the end of a rail. Every tool activeness that changes the runway in the 3D view creates an Disengage and a Redo action indicate. You have a maximum of 10 Undo and 10 Redo action points, afterward that the last Disengage/Redo actions are lost from the end of the list.
The list is reset when you start a new rails or load an *.eetrack project file.


You lot can select a tool set using 1 of the following buttons. When a tool set is selected the rollout that contains the tools and settings for that tool prepare opens in the rollout console. From in that location you lot can select, adjust and employ each tool in the set equally you lot need to, to create your rail.


These settings touch the 3D view of the rail or change the camera view.


Rollout panel - left

The rollout panel shows you all of the tools and their settings for the set that y'all accept selected. Each prepare tin can have multiple rollouts, where the tools and settings are grouped together according to their office. The blue push button at the top of each rollout, which is visible when the rollout is active, tin can be used to hide/show it to make more space for the tools that you are using.
3D View - center

You can resize the 3D view window just it always keeps a 16:nine aspect ratio. This is because the return engine uses this ratio and if the output window is non the same information technology will add blackness bars either forth the top and bottom or the left and correct sides, letter of the alphabet-boxing.
Annotation: You can increase or subtract the quality of the 3D view by adjust the resolution that the render engine uses to create each frame - see General Settings
Moving effectually the 3D view Using the mouse
You can movement the around terrain past clicking on it and dragging it left and right or pull towards or push it abroad from you lot.
If yous hold the [] key down while yous exercise this so the terrain will rotate instead of moving side to side, forward and backwards.
You can zoom in and out past scrolling the mouse wheel.
Using the keyboard
You can whorl the terrain left, right, forwards and backwards using the cursor arrow keys.
The [+] [-] keys on the number pad will zoom the 3D view in an out.
The [Home] and [Stop] keys volition rotate the camera frontward and backwards.
General settings
The general settings rollout console contains 2 rollouts.
- The Steam Workshop Settings.
- Graphics settings.
○ Steam Workshop Settings
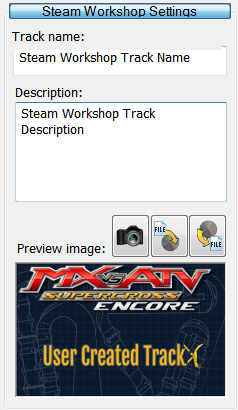
These settings aren't needed until yous have finished designing and testing the rails and you are ready to publish it to the Steam workshop. The details that you enter into this rollout will but exist shown in the Workshop to display and draw your track.
Note: The track images used in the game menus are prepare in the Activities tool set, with one for each activity.
Track nameThis is meant to exist the location proper noun with a maximum of 25 characters.
Note: The activeness names that are displayed in the game menus can be unlike to this and for each activeness.
A clarification of the track and activities bachelor in your rail with a maximum of 256 characters.
Preview paradigmYou can use the screenshot button to snap a moving-picture show of the track in the 3D view, or you lot tin can import an image you take created in another plan. The prototype has to exist a specific size, 638 x 358 before the Steam volition take if the Workshop.


○ Graphics settings

You will probably merely need to do this once, when you lot first outset using mXcavator. The driblet downwardly box lists all the suitable screen resolutions supported by your graphics menu.
You lot will demand to restart mXcavator before the new settings take effect.
Annotation: The resolution you select here will control the quality of the rendered frame inside the render engine. This frame is and so copied to the 3D view window and stretched to whatsoever size that is set to. The frame rate will irksome downward the higher that you prepare this setting. Any extra quality in the rendered frame is lost if the 3D view window is smaller than the rendered frame size that you select here.
Terrain forming tools
The terraforming rollout panel is where you shape the terrain, calculation jumps, hills and valleys to create your track. The terrain height is controlled by a square greyscale image, where the level of white of each pixel controls the height at that position in the terrain. The whiter the pixel the higher the terrain is.
Annotation: mXcavator supports POV ray format height maps. These are 24 chip RGB images where the ruby-red and green channel for each pixel are used together to create a sixteen bit height value. You tin can recognise these because they are usually reddish/green in colour instead of greyscale. They are created by terrain sculpting software, like Terragen or Leveller.
In that location are ii rollouts in this panel.
- Global - for importing and exporting height maps.
- Terraform - contains tools to shape the terrain.
○ Global

The Global panel contains the buttons for importing and exporting height maps.
Import POVray format
This checkbox tells mXcavator to look the height map in POV ray format. You must select this option before you import or reload the pinnacle map.
Summit scale
The elevation scale adjusts the terrain height in the height map then that white pixels get the same pinnacle every bit the elevation scale in anxiety after it's imported into your track.
Note: You can adjust the Elevation scale after the height map has been imported. Placed objects and trees volition adjust their height as with the terrain.


○ Terraform

The Terraform console contains the tools and brushes yous need to shape the terrain to your runway. There are tools to raise, lower, equalize and polish the terrain every bit well equally controls to ready the strength, size and rotation of the brushes.
In that location is a choice of set up fabricated brushes that you tin can use with these tools.
At that place is besides a option of ready made jumps and berms that y'all can use like brushes, to place around the track.

Select the size of the brush previews.
Preset brushes
The following tools are used with the preset brushes. Y'all can control the size, strength (height) and rotation of the preset brushes using the controls at the bottom of this panel.


Preset shapes
You can command the size, force (summit) and rotation of the preset bound and berm shapes using the controls at the bottom of the panel.

○ Brush properties
Size X, Size Y
These ii controls scale the brush size, measured in pixels. They tin be linked together so that the castor keeps its attribute ratio.
Note: If you use bigger sizes yous might notice some lag when y'all movement or apply the brush, depending on the speed of your computer.
Notation: Using the [Shift] + Mouse Bike yous can accommodate the size of the brush while you are using it in the 3D view.
[Shift] + 
Strength
This controls the force of the effect that the castor has on the terrain. The value can be 1 - 100.
Rotation
Rotate the castor from 0 to 360 degrees, this is specially useful when placing preset shapes so that they line upwardly as your track twists and turns.
Note: Using the [Ctrl] + Mouse Bicycle you tin adjust the rotation while you are using the brush in the 3D view.
[Ctrl] +
Smooth
Adds extra smoothing to the shape of the brush.
Base acme
Set the terrain height that is used with the level to base meridian tool.
Terrain painting tools
The Painting tool set is where you can change how the terrain that you have but shaped will look and experience to ride on. By irresolute the clay on the track you don't only change how it looks but you too change the way the dirt reacts with the wheels. You can alter the drag and slip backdrop also as changing how the clay ruts up, by setting its softness.
MX vs. ATV Supercross Encore supports 7 layers of clay, layered 1 on top of the next and so that higher layers hide the layers below. So you should build the layers as they would be in the real earth, because every bit each of the top layers is worn through past riding over them, the layer underneath become visible.
You can selection your clay from a library of all the dirt types used in any of the MX vs. ATV Supercross Encore tracks as well as any of the Reflex tracks. Each has preset backdrop, only yous tin also change them to suit your track.
One time you take selected and applied dirt to your track, there are tools to add a few more final touches to the look of your rails'due south terrain, these are wetness, shadows, Luminance and chrominance.
The Painting panel contains four rollouts.
- Select paint tool.
- Chrominance settings
- Dirt settings
- Paint castor settings
○ Select paint tool

This is where you import and consign images and select tools related to applying dirt textures and effects.


Notation: Using this at full forcefulness can exist used for adding white lines around the edges of the runway.


Note: For the clay tool the eraser merely deletes the currently selected layer, and so if the layer that you lot are deleting is covered past dirt in the layer to a higher place, y'all will not see the dirt in the selected layer disappearing.
○ Chrominance settings

This rollout is just active when the Chrominance tool is selected and lets you gear up the color of the chrominance brush.
○ Dirt settings

This rollout is only active when the Dirt tool is agile. Information technology contains the tools to select, apply and change the properties of the dirt that you can apply to your track.
Particle and tire runway colour
This volition be the colour of the dirt particles in the roost, so you will desire to choice a colour that closely matches the combination of dirt that you have selected in the layers. Clicking the button opens the colour picker, where yous can cull a colour from the palette or use the centre-dropper tool to select a colour directly from the 3D view of your track.
Dirt layers
The brush will paint the highlighted dirt layer on to the terrain. Layer 0 is the tiptop most layer and will cover anything that you pigment in the layers below it. Layer 6 is the base of operations layer and will be seen where cipher is painted in the layers above.

Each layer has a blue, green, ruby-red, or black button side by side to it.

If you click on ane of these buttons you will open the dirt library panel, where y'all can select clay textures from the list of previews.
Tiling charge per unit
This affects how often the dirt texture is repeated beyond the terrain. When you select a dirt texture from the library, it has a default value for tiling rate, but you can modify this if it suits your track. The higher the number the more than times the texture is repeated beyond the terrain, which has the effect of making it await smaller or higher resolution.
Softness
This controls how rapidly the dirt will wear away creating ruts and exposing the layer beneath. A value of 0 is hard, used for surfaces similar physical or asphalt. College values are suitable for sand or snowfall.
Slip
This is how much traction a tire will have when the ability is applied. College values hateful less traction, so snow would be 3 or four and most dirt would typically be 2.
Drag
Drag is the slowing result of the surface on the rotation of the wheels. Dirt would typically exist 1 and
sand or snow would be 2 or iii.

○ Castor properties

This rollout contains the preset brush shapes that you can use with any of these pigment tools. Below the list of brushes are the controls to control the brush backdrop.
Brush modifier controls
Size 10, Size Y
These 2 controls scale the brush size, measured in pixels. They tin can exist linked together so that the brush keeps it's aspect ratio.
Note: If you use bigger sizes you lot might observe some lag when you lot motility or apply the brush, depending on the speed of your figurer.
Note: Using the [Shift] + Mouse Wheel you tin adjust the size of the brush while yous are using it in the 3D view.
[Shift] +
Forcefulness
This controls the strength of the effect that the brush has on the terrain. The value tin exist ane - 100.
Rotation
Rotate the brush from 0 to 360 degrees.
Note: Using the [Ctrl] + Mouse Bike you tin adjust the rotation while you are using the brush in the 3D view.
[Ctrl] +
Smooth
Adds extra smoothing to the shape of the castor.
Creating race activities
All custom tracks have a free ride activity, just you lot can also add a race activeness if you are making a runway to race on. The nearly of import part of a raceable track is the spline path which defines the boundaries and direction of the racing surface area of the track, every bit well as telling the AI how and where they need to get.
This panel contains the tools needed to create and tune the spline path as well as a place for you to provide a track image and enter a track name which volition appear in the in-game menu for each action.
The panel contains iv rollouts.
- Activities
- Rails
- Track node
- Track segment
○ Spline paths
A spline path is a serial of spline nodes that are all linked together. The spline path needs to form a complete loop, merely it tin can too have a offset funnel that runs from the backside start line to join up to the primary track loop.
Track nodes
A spline node is made upwardly of 3 points, a left boundary, a right purlieus and a eye point. Each node can be moved by moving all 3 points together or each single bespeak can exist moved individually.
Track segments
A segment is a series of nodes that is only joined to 1 node before information technology and i node after. Where a funnel joins the primary loop you lot take ii incoming nodes that both bring together to a unmarried node. This breaks the spline path into 2 segments.

The funnel segment is highlighted in xanthous, the rails loop segment is not.
- The funnel from the start node to the node where it joins the main loop.
- The primary loop, from the node where the funnel joins it right circular back to where it joins dorsum to the same node.
You tin also add segments to add alternative routes betwixt 2 points in your runway and let the riders decide which route works best for them.

Laying out a spline path
Place the showtime node 10 ft behind where you want the Startgate to be so click the spline out following the track around. When you get to the bespeak where the main loop joins dorsum up to itself again, the cursor changes to a link icon, this is how y'all know y'all can click the mouse again to join the loop.
As you click the spline path around corners the terminal node adjusts its position so that information technology is rotated half way between the nodes on either side of it. Sometimes this leads to a spline node that overlaps the i adjacent to it.


Overlapping spline nodes will cause the rail compilation to fail. When it fails the spline node that is causing the problem will be highlighted ready for you to suit information technology. You tin can encounter the overlap, because information technology leaves the rail darker where the spline nodes are overlapping.
AI tuning
One of the of import functions of the spline path is to fix control parameters for the AI to make them more competitive. Parameters can be fix for both individual nodes and segments. Once you lot have laid out the master loop of the spline path, you can add extra segments inside the main path and use the properties on these to tune the AI performance and give them dissimilar paths to follow to make them more realistic opponents.
○ Cutting-scenes
When y'all add a race activity, cutting-scenes are automatically added for the get-go and podium sequences. These demand you lot to add a Startgate and a Podium before they can work. If y'all forget to place either of these objects the rail will fail to compile and you will get a message telling you what is missing.
These scenes also a number of human characters, Coiffure chiefs, Track officials, 30 second girl, trophy girl, Domestic dog-house guy and crowd people. These characters are available from the library to exist placed around the rails, but because they are also used in the cut-scenes they are limited to 1 case of each character per track.
Note: These human characters will non announced in the free ride activities, only the race activities.
○ Activities

The activities rollout is where yous can add or remove a race activeness to your rail. This is likewise where y'all can add the track name and image that volition be used in the game menus for your track.


Note: Just race activities tin can be removed.
Action list
When you select an activity from the list, both the in-game name and the preview epitome for the selected activity will testify.
In-game name
This is the proper noun for the activity that will appear in the game card, for the selected activity type selected. The name is express to 25 characters, to fit in the game bill of fare.
Preview paradigm
This previews the image that you have selected to announced in the carte du jour when this activity is selected in the game. You tin create this image using the snap shot button or by importing and image from file. The image needs to exist 2048 10 1024, if information technology is not this size then information technology will be resized.

Include in export
By unchecking this box y'all tin exclude an activity from existence exported when the track is compiled either for testing of when it'due south being published to the Steam workshop. This gives you the option to compile the track without an activity without having to delete the activeness.
○ Track

This rollout contains all the tools that y'all volition need to build a spline path for you race activity.


Notation: This cannot exist placed in a funnel.


Hibernate Dog House guy
As role of the raceable activities, the cutting-scene at the start and the podium sequence at the end of the race are added automatically. A domestic dog firm guy is added to the commencement line sequence unless this box is checked.
Next segment track width
This is the width, in feet, between the left most and correct most purlieus points of the next track node to be placed.
Skip altitude
If a rider leaves the track, this is the maximum distance, in feet, that they tin can ride without re-inbound the track before they are reset to the point where they left the runway.
Ignore 1st lap as completed
If your rails has a funnel and the finish line is in the early part of the lap, then if the lap timer is triggered on crossing the finish line for the 1st fourth dimension, the 1st lap fourth dimension will be much shorter than for a total lap. In this instance you tin check this box, so that the lap timer and the lap count don't start until the 1st passenger crosses the finish line on the 2nd lap.
○ Runway node

To help the AI riders to exist competitive they demand to be tuned to take good lines, accelerate and restriction in the right places on the track. You tin assist achieve this by adjusting the settings in this rollout. It is activated whenever a rails node is selected and you will change the backdrop for the selected node.
○ Rails segment

Some other way to assist the AI riders to be competitive is to adjust the backdrop associated with each segment. Y'all tin can do this past adjusting the settings in this rollout. It is activated whenever a track segment is selected and you will change the backdrop for the selected segment.
Lighting, fog and skies
This rollout panel is where you can change the sun direction settings, various ambient lighting properties, the fog properties too as selecting the sky box texture.
This console contains 3 rollouts.
- Lights
- Fog
- Skybox
○ Lights

The lights rollout lets you lot modify the properties that bear upon the ambient lighting. The default settings are taken from one of the stock tracks.
Note: Small changes in the calorie-free colors and intensity can have large effects and so these are better thought of as advanced options.


Light position


The left-hand control lets you change the direction of the dominicus, while the right command sets the height or bending of the lord's day. The default settings are taken from one of the stock tracks. To change the settings click on the sunday and elevate it around the control expanse. You will see the affect of the new sun bending equally you motion the controls.
Notation: If the sun angle is set up too low yous might get some unexpected lighting effects. The default setting works with most of the skies, so you don't actually need to change these settings.
Light colors and intensity
These color properties take a combined affect on lighting on the track and should be changed by only pocket-size amounts. The lord's day colour volition tint the whole scene and then to keep it looking realistic you will probably want to showtime experimenting by keeping the colors close to the medium grey to white calibration.
To change the color you can click on the color box, which volition open the colour picker. You can and so select a color from the color palette or employ the eye-dropper to pick a colour from the 3D view window.
Use the slider to change the colour intensity or you tin can type a value into the edit box.
○ Fog

Distance
Start
The distance from the viewer when the fog effect starts to increase from 0.
Terminate
The distance from the viewer when the fog effect reaches its maximum.
Color
Outset
The fog effect color when it starts to increment from 0. To change the color click on the colour command and select a color using the colour picker that opens.
End
The fog effect color when it reaches its maximum. To change the color click on the color control and select a color using the color picker that opens.
○ Skybox

This rollout is where you select a different heaven texture for your runway.

Skybox list
The listing contains all of the skies that are available in MX vs. ATV Supercross Encore tracks. To modify the skybox texture you can click on a sky preview in the list.
Placing objects
In one case you lot designed the track layout, inverse the dirt and set the lighting, fog and skybox you are gear up to showtime placing objects to build a more realistic environment.
This rollout panel is where yous can select objects from the library, place and arrange them on the track and where the objects take them set their properties.
This panel contains three rollouts.
- Object placement
- Object properties
- Object library
○ Object placement

Once y'all have selected an object in the library you can use the tools in this rollout to identify and arrange them on the track.
Note: If y'all hold down the Ctrl primal you lot will add or remove the object that you lot click on to the selection.


This has a number of options to restrict the move.
- Location - across the surface of the terrain (Ten + Z)
- X - left and right
- Y - upward and down
- Z - forwards and back

This has a number of options to restrict the rotation.
- Gratis - rotate in whatever direction
- Ten - around a left/right axis
- Y - around the vertical axis
- Z - effectually a frontward/back axis


○ Object properties
Some objects have backdrop that you can ready. These are:
- bales
- water objects.
Bale backdrop

In the bale backdrop you can fix the bales to exist used every bit upward/down bales. Upwards/Down bales are bales that start a race in one position and and then when the 1st rider crosses the bale trigger (see Activities) they alter their position.
Up/Downward bales are used to marker the runway at the start of a race where the layout changes after the offset lap, for example if the funnel on your rail crosses the main loop of your track.
- The Up bales movement from a position 10ft below to the position that you placed them on your runway.
- The Downwards bales move from the position that you placed them to hidden 10 ft below the ground level.
The bales that are visible for the start only should exist set up every bit down bales and the bales used for the regular race configuration should be marked as Up bales. Whatsoever bales that don't need to modify position can exist left as 'No pop upwards or downwardly'.
Note: These are but useful for race activities, so if you don't plan on calculation a race activeness then you don't need to use Up/Down bales.
Water properties

The h2o properties rollout permit'south you adjust how the water looks, parameters that control the color, transparency, reflectivity and the size and frequency of ripples. All these changes can be previewed in real time.
Notation: These backdrop bear on all water objects, non just the currently selected object.
○ Object library

The library contains nigh of the objects from the MX vs. ATV Supercross Encore tracks. It has been separated into categories to make objects easier to find. When you select an object from the library, at that place is a preview at the bottom of the rollout to aid place which object it is.
Stadiums
The Stadiums that you tin can select from the library are collections of parts, which you tin can identify equally a unmarried object. To proceed the load on the editor lower but the building objects are loaded into the editor. However when yous compile the runway, all the other objects in the stadium, such as the oversupply, are added to the runway.
Each office from all of the stadiums is too available to select from the library, if y'all desire to build your own from parts, however you will not be able to add together the crowd to that.
Note: The human characters that are available from the library are also used in the cutting-scenes, considering of the way they are used only ane instance of these characters is supported. So afterwards y'all have placed 1 of these character objects y'all will run across it become greyed out in the library and no more can be placed on the rails.
Placing copse and bushes
If you are making an outdoor track, the last bear on would be to add some plants. The vegetation rollout contains all the tools you lot will demand to build a set of plants and so place and arrange those plants around your runway.
The vegetation rollout panel has 3 rollouts.
- Vegetation
- Placement
- Build an eco system
○ Vegetation

This rollout lets import, export or reload the last file containing your runway vegetation. These files are saved with the *.forest file extension.


○ Placement

This rollout gives you the tools to place and conform trees and bushes around your track.
Note: If you hold downwardly the Ctrl key, y'all can add the selection the current option.


This has options that restrict the way the tree and bushes are moved.
- Location - motion well-nigh on the terrain (X + Z).
- 10 - move left and right.
- Y - move up and downwardly.
- Z - move forrad and back.


○ Build an eco system

Before you lot tin can start placing trees and bushes you take to build an eco organization from those available in the library. Yous can add a maximum of 21 trees or bushes to your eco system, however because of limits in the eco arrangement resource the actual number will depend on the size of copse and bushes that you choose. In reality this usually turns out to be between x and xiv.

This volition open a popup showing the unselected vegetation types left in the library.

If y'all click on the preview image of the vegetation blazon that you want to add from the library, it will be transferred to your eco system.

Annotation: This volition first remove all of the trees or bushes of this blazon from your track. If you lot accept placed a lot of trees or bushes this tin can accept some time to process.
Making vehicle tracks
Adding vehicle rail bump models to your runway volition add some other level of detail to the terrain to requite information technology a more realistic look. With these tools yous tin can apply caterpillar rails, tractor tire tracks to the dirt as well equally deep and shallow ruts.
Using the same system it is possible to lay out roads with freshly painted or old cracked asphalt.
Note: The terrain softness and deformation characteristics are not affected by laying route tracks out. So if you lot practise non want ruts and dust particles to appear equally you ride over the road, yous will need to select a suitable terrain 'dirt' type (concrete, or asphalt) and paint it on the terrain everywhere that the road is laid.
This panel has 2 rollouts:
- Vehicle tracks
- Vehicle track node
○ Vehicle tracks

Vehicle Track menu buttons
At the peak of the Vehicle rail rollout are four carte buttons:


Vehicle Track Tools
Nether the Vehicle runway menu buttons are the tools. These piece of work in a very similar way to the Spline layout tools. Use the offset a new track tool to place the first point and then keep clicking out the rails around the terrain.
Note: The editor tries to continue the tracks aligned as you lot layout effectually corners, however the tracks might nonetheless get unaligned. Alignment restarts each time a new department of vehicle track is started, so if you are unhappy with the alignment, a workaround would be to start a new section.
Offset a new section of vehicle tracks. Afterward you place the start betoken of a new department, the tool moves on to the Go on tool.
Continue the vehicle track section. This will add together new nodes to the vehicle track each time you click on the terrain, continuing from the terminal point of the track section that contains the highlighted (yellow) node.
Insert a new node between the selected node and the node after it.
Click and elevate to draw a bluish box over the terrain where every node inside the blue box will be highlighted as being selected.
Select and move nodes. When the cursor is over a node information technology will alter to a move (arrows pointing in iv directions), which means y'all can click and select that single node. If at that place is no node under the cursor and then you can click and elevate a blueish box to select and highlight nodes.
Delete the selected nodes.
Vehicle Track usage meter
There is limited space for each set of tire tracks so the meter at the bottom of the rollout lets you know how much of that infinite you take used. There is a meter for each vehicle rails type, not 1 for all of them.
○ Vehicle tracks node

Adjusting the slider changes the fade on all of the selected nodes in the currently selected vehicle track blazon.
The effect of the vehicle track for each node can be faded between 0 - 100%, with 100% being invisible and 0% completely visible. This can be useful when you want to run vehicle tracks over a role of the terrain where either tire track wouldn't normally exist seen, like the top of jumps or where the basis might exist harder packed where the tires don't have such a big bear on.
Compiling your track
So you lot're runway is set up for some testing or you've fully tested it and are completely happy with it and tin can't wait to share information technology with the community and get some feedback on the latest masterpiece. And then at present you just need to compile it.
When the runway starts to compile a log window opens showing the compilation progress forth with any error messages caused by errors during the compilation.
The near common errors will be.
- Missing objects that are needed for race activities (Startgate or Podium).
- Overlapping points on the spline path. The nodes where the problem is will be highlighted when you go to the Activities tool set.
- The spline path doesn't completely surround the Startgate. In this case become dorsum to the race activity and make sure the spline path is broad enough to extend out each side of the offset gate equally well as behind it.
Compiling
There is 2 reasons to compile the runway.
- Consign for testing.
- Publishing to Steam workshop.

This compiles the rail and saves it in the folder /DLCBeta of your MX vs. ATV Supercross Encore installation.
Note: If you lot desire to share your rail with beta testers y'all can zip this folder and go far available to them to install on their system.


This will open up the Steam publishing window, which lets you lot bank check that the information that you entered in the Steam Workshop settings is complete, that you have given the rails a name and clarification and created a review image to be displayed in the Steam workshop.
If not and then yous can enter the track name and description in the Steam publishing window, just if you lot need to add together a preview image then you will need to abolish the Steam publishing window and add information technology in the Steam workshop settings rollout, earlier y'all endeavour publishing once more.
Once you are happy with the Steam publishing information press ok, to first compiling the runway. If the runway compiles successfully, which it should if you accept fully beta tested it first, the rail volition upload to the Steam workshop. The upload progress will evidence in the log window.
Once the upload is completed successfully, your track should announced in the workshop and will be bachelor to others in the community to subscribe to and and then ride.
Note: Each time that y'all publish a track to the Steam workshop it creates a unique track id. And so even if you publish the exact same track again, it will non replace the original, instead you will have two identical tracks in the workshop. This volition be confusing for people who want to subscribe to your tracks. You are recommended to delete whatsoever duplicates if you want to update or re-publish a rail.
Subscribing to workshop tracks
After y'all have subscribed to a track you have to wait for the rail to be downloaded to your game installation earlier you start the game, otherwise it will not appear in your game menus.
Note: If the subscribed rail doesn't appear in the game carte then it could be that the runway has non have completed downloading, so you will need to restart MX vs. ATV Supercross Encore one time the download has completed.
DOWNLOAD HERE
Posted by: fabianhicessell.blogspot.com


0 Comments